Documentation

Follow below steps for hassle free setup

Configure Plugin Settings

General Settings

Enable backend file manager – Select the user roles for whom you want to give Access to Backend ‘UPF File Manager’.
For example – If you give access to Editor role. Any user from this role can access Backend File Manager same as Admin.
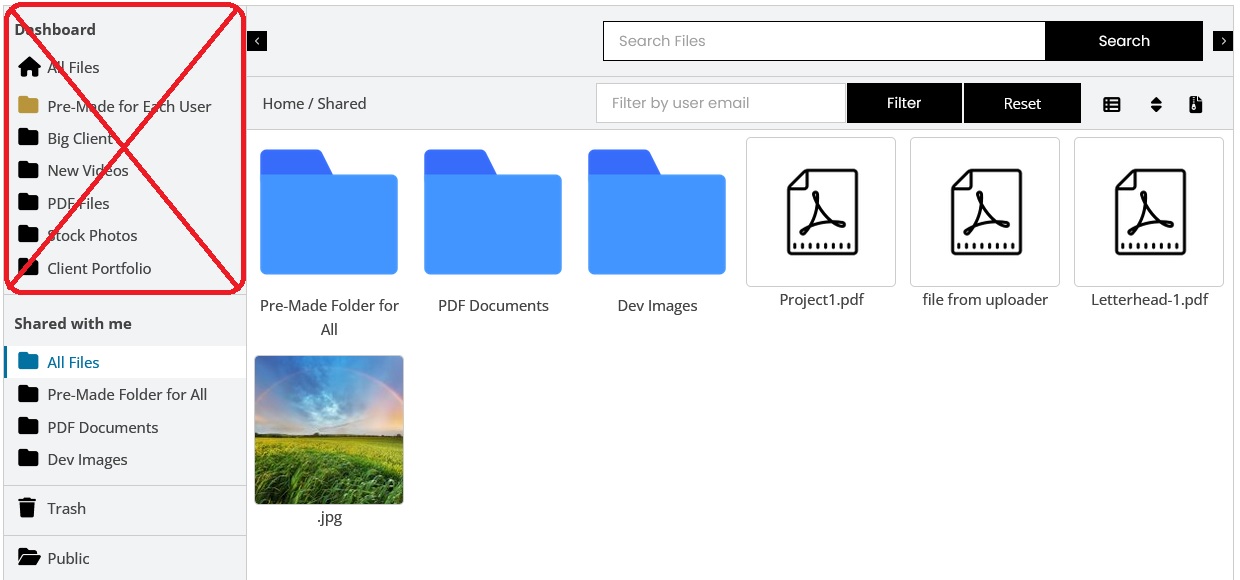
Hide My-files section – Select the user roles for whom you want to hide the ‘My Files’ section which appears as the first item on the left sidebar on frontend dashboard. Selecting roles in this option will restrict them to upload only in the shared folders with full-access.
Example- if you select subscriber role in this option, then all users from the subscriber role will not see the my-files section on the frontend and they can not create or upload folders/files in their my-files section. But they still can upload files or create folders in the shared folders with full-access.
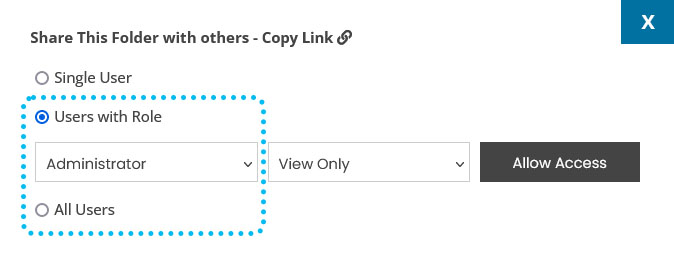
Enable role based sharing for all users – By default, users can share files by using email address one by one. Only admin is allowed to share files on role basis or to all users at once.
This allows users to share their uploads with all-users or users based on roles. if you add a user role here it will be enabling its users to share their files with ‘all users’ and ‘role based users’ at once. At front-end dashboard these users will see two more option while sharing a file/folder – ‘Users with Role’ and ‘All Users’.
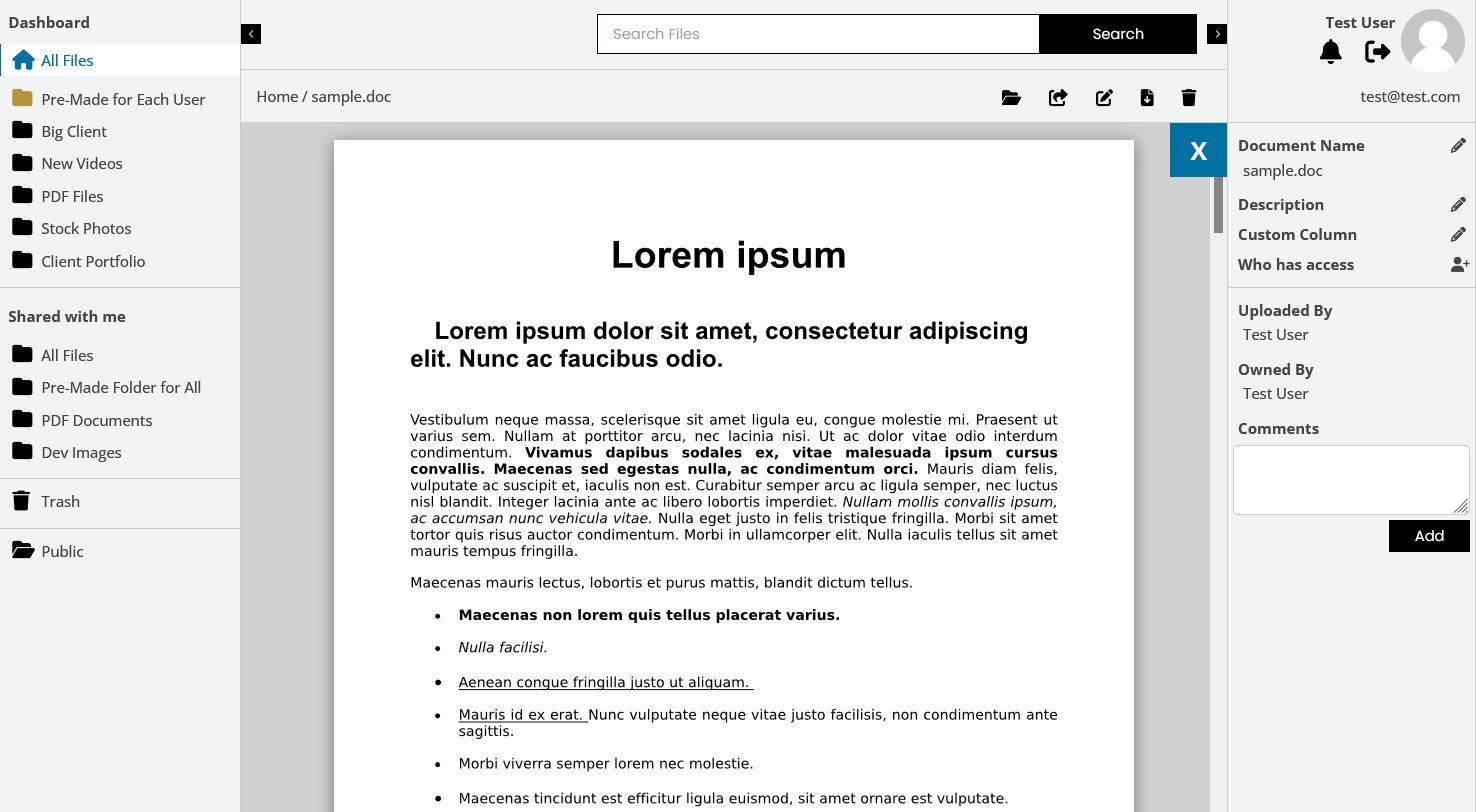
Enable Doc Viewer – Enable this option to allow preview for doc, ppt, csv, excel files etc on the frontend using google docs viewer. Enabling this will also give google docs permission to view the file and if someone has the direct url to a file, he/she can use the google docs to view the file without permission. So, please keep in mind that your document related files will be accessible by google docs viewer.
Enable public folder – This option will allow users to get benefit from Public Folder feature. ‘Public’ section will appear in user’s frontend file dashboard. More details about Public-Folder Here.
Enable Sorting – This option will allow users to sort the files and folders by their name, modified date, and size in ascending and descending orders.
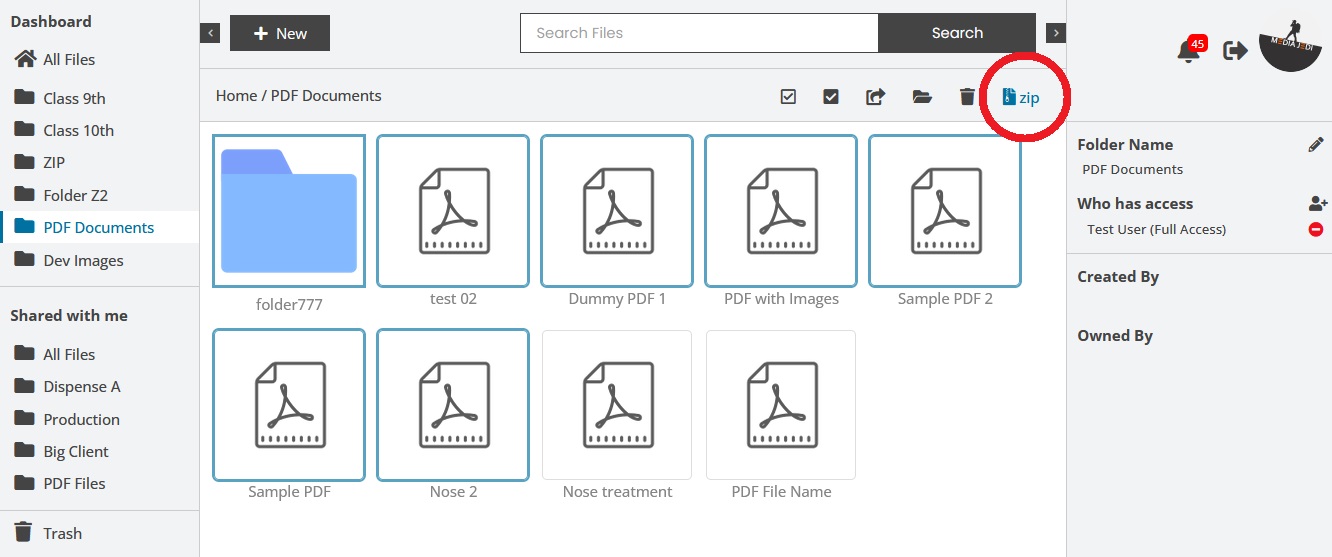
Enable Zip – Enabling this option will display a zip icon button in the toolbar on frontend. Users can then click the zip button to make a zip file of the current folder or selected files/folders and then download a single file instead of downloading files one by one. Zip files can be previewed on the site as well. Note: You must have php zip extension enabled on your server to use this feature. Contact your host to check if it’s enabled or not. For more step by step guide, please refer to the dedicated zip feature article How to Use ZIP Feature.
Enable Pagination – Enabling this option will allow you to display number of items per page-view in content area.
UPF Manager Page URL – Please paste the URL of the page with [upf_manager] shortcode. This URL will be used to open files/folders using copy link and email notifications. We recommend filling this field for correct functioning of the copy-paste link feature.
UPF Privacy Policy Link – Enter a URL to your privacy policy page if you want to display the privacy policy link at the bottom on the right sidebar on frontend.

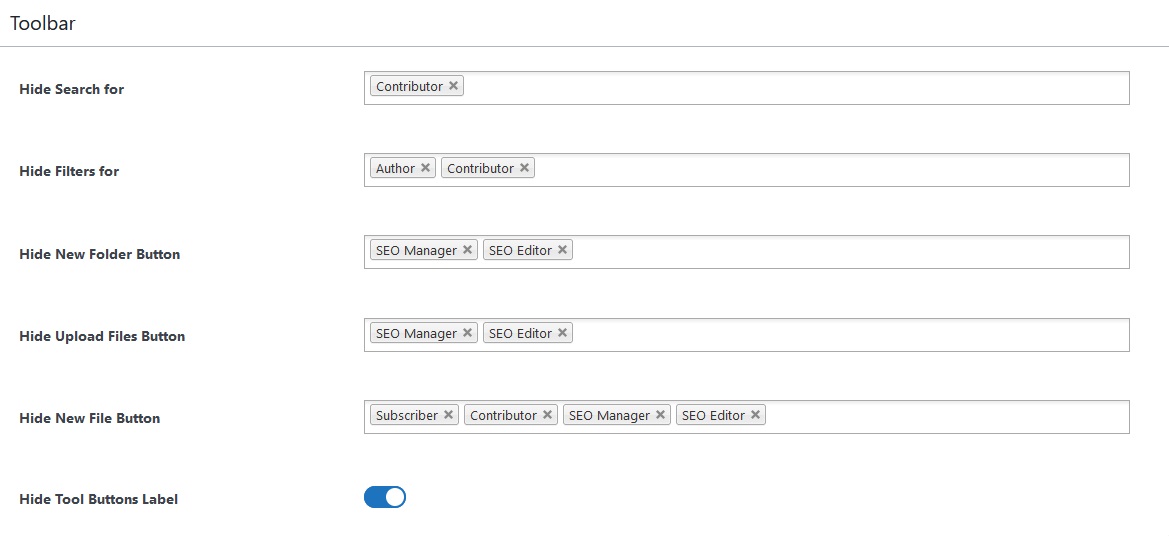
Toolbar Settings

In toolbar settings you will get following options.

Hide Search – Select the roles for whom you want to hide the search box on the frontend.

Hide Filters – On the frontend (under the shared-with-me section), there is a filter form that allows users to filter the files/folder by uploaders email addresses. Selecting the roles will hide that filter box for these users.

Hide New Folder Button – If you want to restrict some users from creating folders, select the roles and the users from these roles will not see the New Folder option under the “New” button.

Hide Upload Folder Button – If you want to restrict some users from uploading folders from PC, select the roles and the users from these roles will not see the Upload Folder option under the “New” button.

Hide Upload Files Button – To disable uploading on frontend. Use this option If you don’t want your users to upload files anywhere. Users from these roles will not see the Upload files option under the “New” button.

Hide New File Button – This option is applicable if you are using the text-editor addon. When you use the text-editor addon, a new option “New File” appears under the “New” button on frontend. This creates a text file with an editor where you can write and save the file. Select the roles for whom you want to hide the “New File” option.

Hide Tool Buttons Label – By default, the toolbar buttons (share, rename etc.) have icons and labels on them. Enabling this option will hide the labels and keep the icons only. However, there is a title associated with each toolbar button/icon that always appears on mouse hover regardless of this setting.

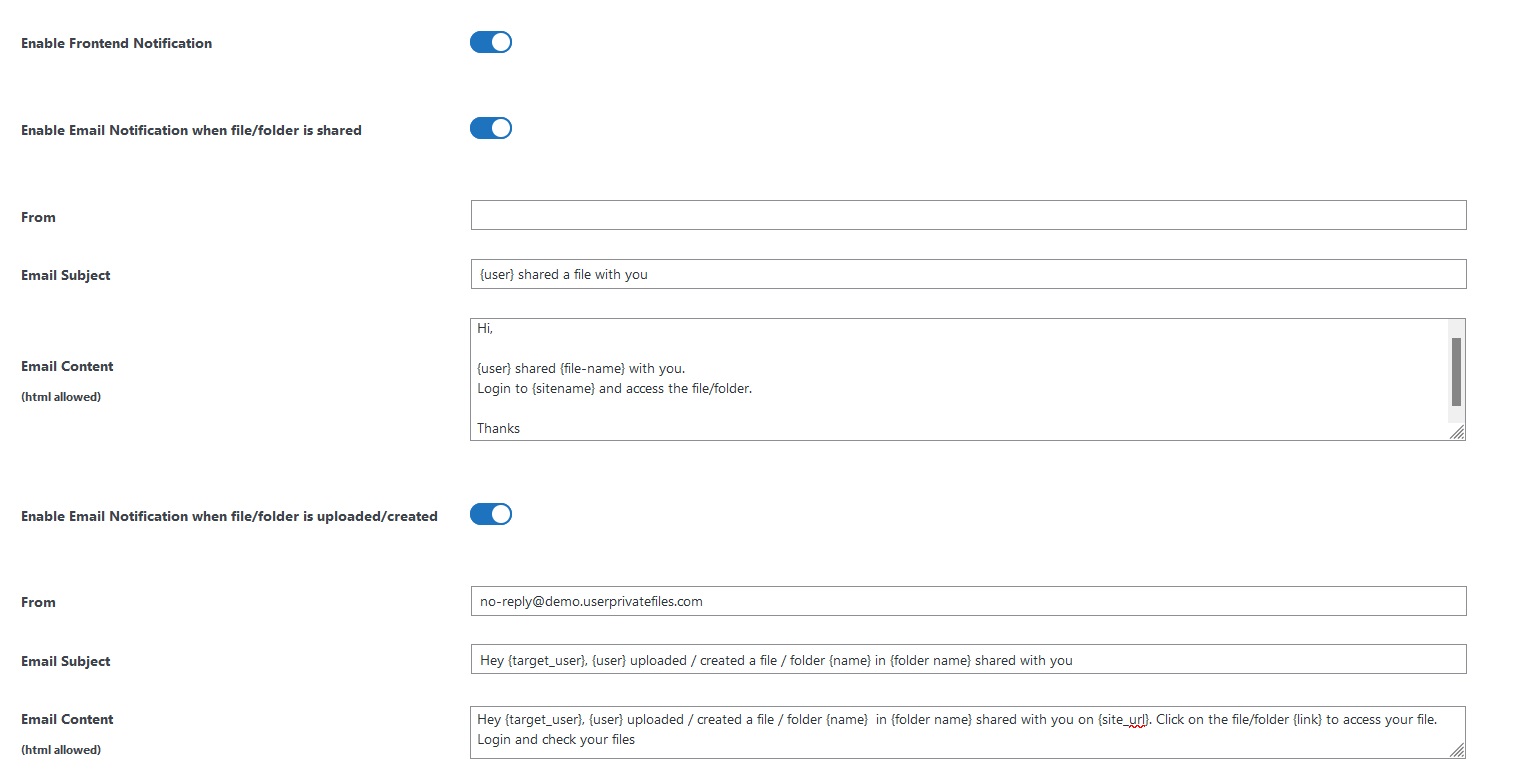
Notification Settings

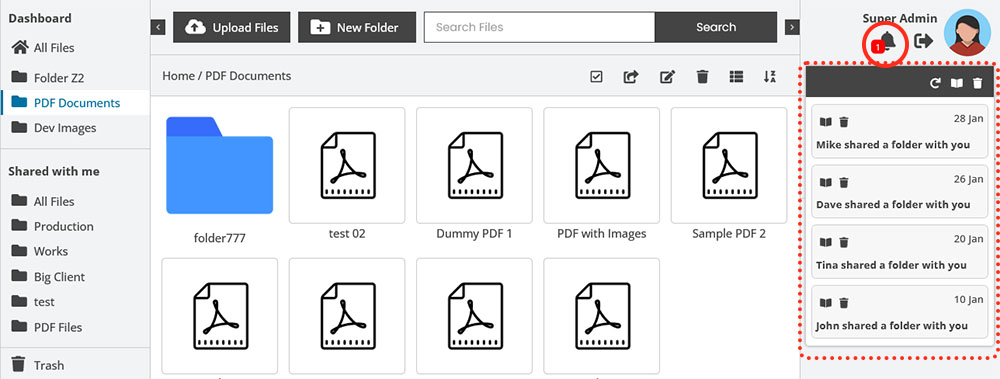
Enable Frontend Notification – This option allows a frontend notifications feature. With this option enabled, users will see a bell icon on the right sidebar.
Enable Email Notification when file/folder is shared – This option will enable sending of emails to users when a file or folder is shared with them. You can customize the email from, subject and content fields with dynamic variables like user, link etc.
Enable Email Notification when file/folder is uploaded/created – With this option enabled, an email will be sent to users with folder access whenever:
– A file is uploaded in a shared folder.
– A folder is created in a shared folder.

These Variables can be used in email template:
{site_url} – Your Website address.
{target_user} – A User who will get this email.
{user} – A User who uploaded/created/shared files/folder.
{name} – Uploaded/Created File/Folder name.
{folder name} – Name of shred folder where user uploaded a files or created a folder within.
{link} – Direct link of file/folder. When user open this, it will take user to the file after successful login.

Send only one email for bulk uploads – It will stop sending lots of emails when user uploads files in bulk. By Enabling this option, Bulk upload notification emails will be wrapped into single email.
At last, Click Save to save your changes.